Improving Wi-Fi 2.4GHz and 5GHz speeds after Full Fibre (FTTP) upgrade

Given I work with computers every day, and have a good understanding of computer science and networking, I recently needed a refresher to improve my Wi-Fi connection speeds.
In this article, we'll go through the steps I took to increase Wi-Fi speeds from 25Mbps to all 150Mbps after a recent internet connection upgrade. Maybe these steps can help you to maximise your own connection speeds too.
Setting the scene - the issue
My fibre connection was previously FTTC (fibre to the cabinet) but was recently upgraded to 'Full Fibre' or FTTP (fibre to the property). Great! This meant I was able to go from 25-30Mbps (megabits per second) to a maximum speed of 150Mbps.
After the installation by CityFibre, I was impressed with the setup and everything was working ok with the new router but Wi-Fi speeds weren't always better, suffering some drop-out and similar speeds to the prior setup. I needed to investigate this and figure out how to get the full speed throughout the property.
The following sections go step-by-step through what I did, what you need to know and the tactics you can try to improve your Wi-Fi connection speeds. I'm not saying these things are guaranteed to work for you, but they've been a huge improvement for me and I wanted to share them.
To begin, check your wired connection speed
A good starting point is to first check that you are receiving the increased speeds by connecting your device to the router with an Ethernet cable. I have an Xbox Series X console connected this way, which has a Network connection speed test in the settings menu.
You can compare your wired / wireless speed by using the same or another device and searching Google for "internet speed test".
Both of these methods give the download and upload speeds. The Xbox Series X was receiving the full 150Mbps so the upgrade was definitely working correctly through a wired connection.
Understand the difference between 2Ghz and 5Ghz bands
Before progressing, it's important to understand what the 2.4Ghz and 5Ghz Wi-Fi bands are and their pros vs cons.
Here is a crash course:
2.4Ghz = slower but larger coverage area - can also get interference from radios, bluetooth, other networks etc.
5Ghz = faster but smaller coverage area
Most routers auto-assign a device to a band based on how far away the device is and if the device is capable of using the 5Ghz band. More devices are assigned to the 2.4Ghz band and that can lead to crowding.
To check this out, login to your router admin panel at the local IP address http://192.168.1.1/ ... the admin username and password is typically found on the back of the router.

In Wi-Fi Settings / Device Settings, you can then see which devices are connected to which band. If a device is connected to the 2.4Ghz band, that could be the reason for lower speeds! You can try re-connecting the device if you're close to the router to attempt to switch to the 5Ghz band.
Move and elevate your router
Okay, starting with the basics, if your router is crammed into a cupboard or behind a huge TV, it's likely going to block the signal substantially.
You can try to move it to a higher location where it isn't blocked in. You may need to run the main cable connected to the router to a suitable spot then re-test the speeds.
Check your device Wi-Fi network adapter
Sometimes for older devices, the built in Wi-Fi chip / receiver cannot actually connect to the faster 5Ghz channel. To check this I found a great article from Louisiana State University Wireless: Determine if Computer Has 5GHz Network Band Capability (Windows). This can be summarised as:
- Search "cmd" in the Start Menu.
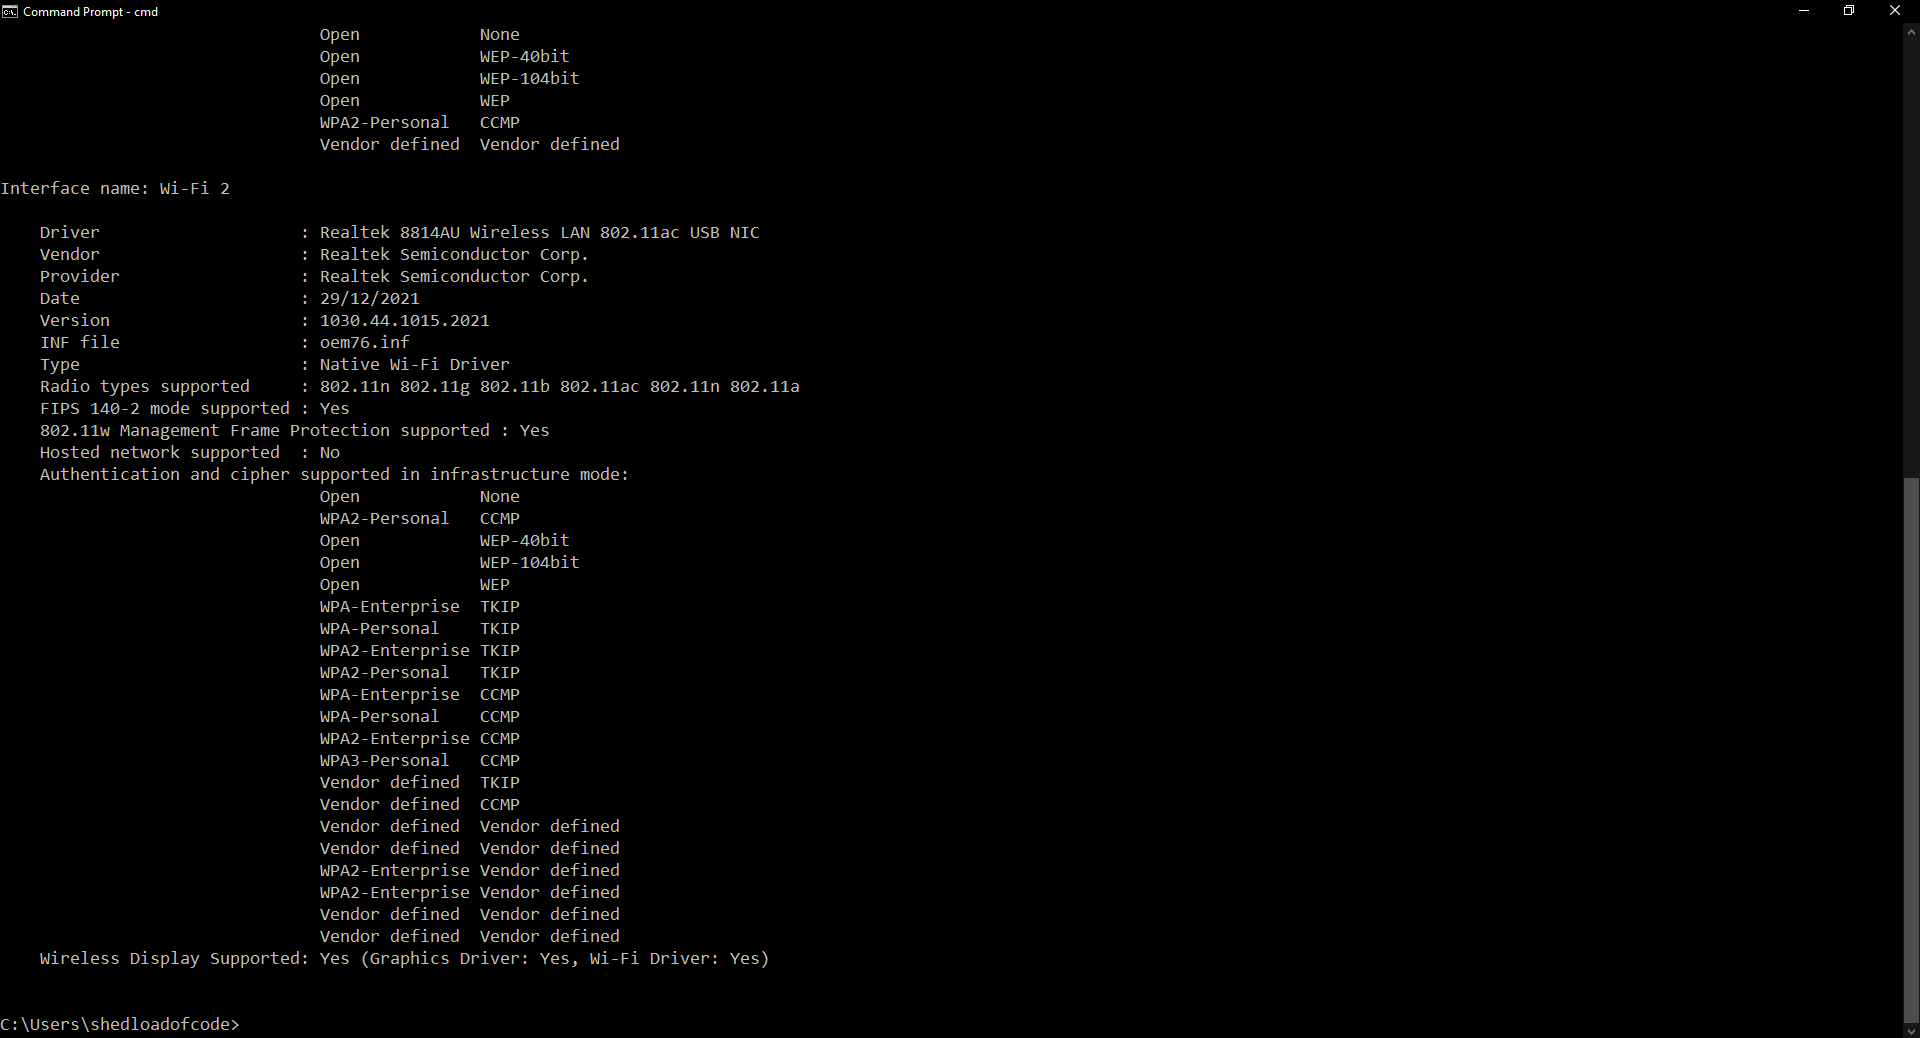
- Type "netsh wlan show drivers" in the Command Prompt & Press Enter.
- Look for the "Radio types supported" section.
- If the network adapter supports network mode 802.11ac:
- The computer supports both 2.4GHz and 5GHz - your network capability IS Dual-Band Compatible.
- This is true if your computer supports both 802.11ac and 802.11n together as well.
- If the network adapter supports only network mode 802.11n:
- The computer MAY OR MAY NOT have 2.4 GHz and 5GHz network capability and be Dual-Band Compatible.*
- If the network adapter does not support either of these network modes, it IS NOT Dual-Band Compatible.
Where a device can only connect to the 2.4Ghz band it may still get okay speeds and have further range, but just won't be able to benefit from the much faster 5Ghz band.

Upgrade your device with an external Wi-Fi network adapter
If it happens that your device Wi-Fi network adapter is older and incapable of connecting to the 5Ghz band then it might be a good time to upgrade with an external network adapter. Newer adapters are capable of pulling in greater speed, are dual-band so can connect to both the 2.4Ghz and 5Ghz bands and can hold the connection better for less drop-out.
The WAVLINK AC1900 USB WiFi Dongle has delivered the best improvement in speeds to my upstairs desktop PC, and seems future proof in that it's capable of pulling even greater speeds than my current maximum of 150Mbps. It should pull in up to 600Mbps on 2.4Ghz and up to 1300Mbps on 5Ghz bands respectively. So if you upgrade your plan with your ISP, you're covered - although I'm sure that would be more than you'll ever need.

These links are on Amazon, I don't receive any commissions for these links and have used both products, you should be able to find these products elsewhere if you wish though. Both worked very well and pulled in consistent speeds close to the connection's max 150Mbps but can go even higher if your ISP plan allows.
My desktop PC hadn't moved, it was in the same location in my home office, as when I did the first test (left of the image below) however with the new WAVLINK network adapter the internet speed test had gone from 44 down 26 up to 147 down 144 up! You can see in the image below I'm connected to Wi-Fi 2 which was the new WAVLINK external network adapter.

It was a similar result with the lower profile TP-Link AC600 adapter on my laptop, but the WAVLINK seemed more robust and stable - with it's four prongs likely the reason!
So is trying an external network adapter with your desktop PC and laptops worth a try? These results say absolutely!
A final point, usually with an external network adapter you must install the relevant driver for the new adapter. With WAVLINK you head to their site, download for Windows or Mac, then install. Pretty simple process and the instructions are on the box.

Add a Wi-Fi mesh extender to avoid dead zones
Now we've covered using an external network adapter to improve receiving Wi-Fi network signal, what about improving general outgoing coverage to address dead-spots in the property? This proved to be a little tougher. The only thing I have tried so far is using a Wi-Fi mesh 'extender'. This effectively acts as a second router, which has the option to split the 2.4Ghz and 5Ghz bands on the extender.
You can therefore end up with multiple access points or SSIDs. I split up the bands and then named them something easy to understand like:
- TALKTALK-843
- TALKTALK-843_EXT_24
- TALKTALK-843_EXT_5
This gives the option to connect to the main router downstairs, or the extension upstairs either on the 2.4 or 5Ghz bands. I used the TP-Link range extender as seen below.

This worked quite well, but still struggled in one room - must be a particular thick wall slightly blocking the signal. Still a very good improvement though with no drop.
The pros vs cons of using a Wi-Fi extender are:
Pros:
- You can choose which devices connect to which access point - spreading the network load
- You can choose which band you want to connect a device to
- It should improve coverage and reduce dead-spots
Cons:
- It is in effect still one connection just mirroring and relaying from the host router
- Can introduce interference as now there are two access points broadcasting
- It can only improve the coverage if it is still in range of the host router - ideally half way between the router and the dead-spot
It was an inexpensive option to try and it did boost coverage in certain rooms. It provides another option to try in combination with the others.
Consider adding a wired connection for critical devices
I haven't taken this step yet, but I am considering it. A wired Ethernet connection may pull in similar speeds to a solid external network adapter, but the difference is reliability. Even the best Wi-Fi adapter may suffer drop-out at a critical moment like during a conference call or video interview. The chances of that happening with a wired connection is significantly less.
If you're not a fan of ripping open your walls to install network cable, then a DIY job of running (and hiding) flat Ethernet under the carpets or floorboards, up the stairs and along skirting boards and into your PC is an option. Is it an ideal solution? Nope. But as long as it's run where no one will disturb it this temporary fix might become a permanent one and also very reliable.
The one I'm looking to try from BUSOHE below claims to be flexible, durable and support over 30kg. Sounds tough to me. It's also flat so should be easier to lay under carpets neatly and away from footsteps.

Happy networking
This wasn't a typical analytical or programming article, however to write code and learn effectively, a strong stable internet connection is pretty vital! Worth giving this stuff some thought and taking the time to ensure you have the best connection possible so you can keep coding, learning and building great solutions without any worries.
Not only that, it's good to have a solid and stable setup for video calls, video streaming and screen sharing. All great tools in any digital role.
I hope this article gave you ideas and helped you to improve your network Wi-Fi speeds 😄
If you enjoyed this article be sure to check out other articles on the site 👍